Total: $0.00
Taxes and shipping calculated at checkout


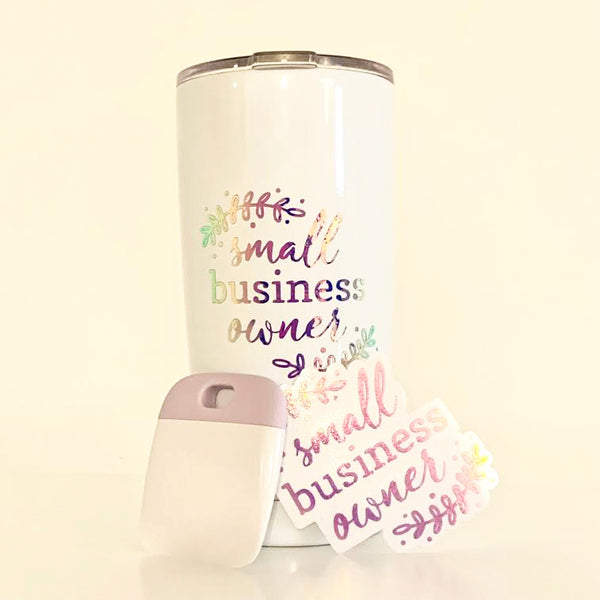
So you are interested in decals or maybe you've already purchased one? Great, we love decals! However, we know there can be a bit of confusion when it comes to the purpose and the application of decals. Don't worry, Knots of Art is here to help! Let's go over a few things about decals...
What are decals?
A decal is essentially an image transfer. In regards to Knots of Art's decals, we offer holographic vinyl decal designs that can be transferred to many different materials.
How do decals work?
We create our designs and the holographic vinyl is then cut using our Cricut ExploreAir2 machine. The design is then weeded (removing unwanted pieces from the design) and is then covered with clear transfer tape. The purpose of the transfer tape is to allow a tacky surface to transfer the design from the vinyl backing to whatever application you choose (such as water bottles, glass jars, mugs, windows, ect.).
What applications can I use for my decal?
We recommend smooth surfaces such as glass, metal, plastic (such as acrylic) paper, or windows. Items such as metal water bottles, glass jars, acrylic signs, mugs, windows, mirrors are best! They are NOT recommended for textured surfaces or silicone.
What you need to know:
In the process of creating our decals, we use a squeegee or scraper to scrape the transfer tape over the design. This allows the vinyl to properly stick to the transfer tape. However, we recommend to slowly peel the transfer tape from the white backing. If you see part of the design is still stuck to the white vinyl backing, place the transfer tape back down, and keep scraping until it fully adheres to the tape (you can use a credit card for this if you don't have a squeegee). We do our best to make sure this is done before we package our decals, but since they are hand-made, it's possible that you might need to scrape them again to make sure the design is sticking to the transfer tape before you apply the design.
How to apply your decal:
We hope this helps! If you have any questions, don't hesitate to Contact us.


